How to Make Your Home Energy Efficient: Power Up with Less Power!

Are you tired of your electric bill being higher than you’d like? Want to save a little green while going green? Well, you’re in luck! Making your home more energy-efficient doesn’t have to be complicated, and it doesn’t require a major overhaul. With a few simple changes, you can cut down on your energy use, save some cash, and even do your part to help the planet. Let’s dive into the easy, fun, and quirky ways to power up with less power!

Step 1: Switch to LED Bulbs (Bright Idea!)

First things first—let’s talk lighting! If you’re still rocking those old incandescent light bulbs, it’s time for an upgrade. LED bulbs are the champions of energy efficiency. They use about 75% less energy than their incandescent counterparts and last up to 25 times longer. Plus, they come in all sorts of colors and styles. So, if you’ve ever wanted to give your living room a funky purple glow, now’s your chance!

Swapping out your old bulbs is one of the easiest ways to save energy and cash. It’s a small change that packs a punch, and it’s as simple as popping in a new lightbulb. Go ahead, brighten up your space with energy-efficient lighting!

Step 2: Install Smart Thermostats (Control Your Climate)

If you’re still adjusting your thermostat manually every time you leave the house, it’s time to step into the future with a smart thermostat! These nifty gadgets automatically adjust your home’s temperature based on your schedule, so you’re not heating or cooling an empty house.

Imagine coming home to a perfectly cozy living room in the winter or a refreshingly cool house in the summer, all without lifting a finger. We’ll install a smart thermostat for you and ensure it integrates with your smart home system, so you’re always in control of your home’s climate. It’s comfort and efficiency all rolled into one!

Step 3: Add Motion Sensors (Lights Off When You’re Gone)

Here’s the thing: when you leave a room, the lights don’t always follow you. But with motion sensors, they can! Motion sensors are perfect for areas like hallways, bathrooms, or garages—places where lights often get left on by accident.

These little devices detect when someone enters a room and turn the lights on automatically. When the room is empty, they’ll switch the lights off, saving energy without any effort on your part. You’ll be amazed at how much energy you save with this simple change. Plus, no more guilt when you forget to turn off the lights!

Step 4: Upgrade to Energy-Efficient Appliances (Powering Down the Old)

Old appliances are like energy vampires, quietly sucking up power when you’re not looking. If your refrigerator is older than your favorite pair of jeans, or if your washing machine is from the “before time,” it might be time to upgrade to Energy Star-rated appliances.

These modern marvels use way less energy, and you’ll notice the difference on your electric bill. Plus, you’ll be doing your part to save the planet—one energy-efficient appliance at a time. So go ahead, swap out that ancient dishwasher and watch the savings add up!

Step 5: Schedule an Energy Audit (The Pro Touch)

You’ve swapped your bulbs, installed motion sensors, and upgraded your appliances—nice work! But how do you know if there are still hidden opportunities to save energy in your home? That’s where an energy audit comes in.

An energy audit is like a health check-up for your home’s energy use. We’ll review your system, pinpoint areas where you could save even more energy, and provide personalized tips to help you make your home as energy-efficient as possible. It’s the pro touch that’ll take your energy savings to the next level.

Wrapping It Up!

Making your home energy-efficient doesn’t have to be a huge project. By swapping out a few bulbs, upgrading appliances, and adding smart systems, you’ll save money, energy, and maybe even a little planet in the process! So why wait? Start today and watch those energy bills shrink. Your wallet—and the Earth—will thank you!

Need help getting started? Give us a call at Platinum Electric LLC, and we’ll help you power up with less power!


How to Make Sure Your Electrical System is Safe: Step-by-Step for Peace of Mind!

Electrical problems can be terrifying—there’s no denying that. From flickering lights to the dreaded “pop” of a circuit breaker tripping, the thought of your electrical system failing can send a chill down your spine. But don’t worry! With a little bit of regular maintenance and some simple checks, you can make sure your electrical system is safe, sound, and running smoothly. Let’s take it step by step, so you can relax knowing everything is in tip-top shape.

Step 1: Inspect Your Electrical Panel (Your System’s Command Center)

Think of your electrical panel as the brain of your entire electrical system. It controls the power flowing to your lights, appliances, and gadgets, and if it’s not up to snuff, the rest of your system can suffer.

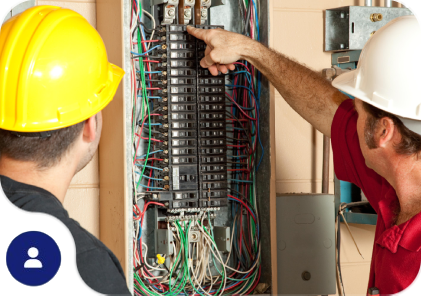
First, take a peek at your panel. Is it old and rusty? Are the circuit breakers constantly tripping? That could be a sign it’s time for an upgrade. We’ll inspect your panel for any potential safety issues and make sure everything is functioning as it should. A well-functioning electrical panel means a happy, safe home!

Step 2: Look for Overloaded Circuits (It’s Not a Party)

Do you hear your lights flickering or dimming every time you plug in the microwave or your hair dryer? That’s a sign your circuit might be overloaded. It’s like having a too-packed suitcase—when you try to stuff in more, things get messy!

If you’re overloading circuits like this, you’re risking electrical fires and damaging your appliances. We’ll take a look at your home’s wiring setup and add new circuits if necessary to keep things running smoothly. That way, you won’t be constantly playing a game of “will the lights flicker now?”

Step 3: Check Wiring and Outlets (Safety in Every Socket)

Outlets might seem like small, innocent parts of your home, but they are actually one of the most important safety factors in your electrical system. Take a moment to inspect your outlets and wiring for any signs of wear and tear—loose outlets, charred spots, or cracks are big red flags!

If you find any of these, it’s time to replace them pronto. And don’t forget GFCI (Ground Fault Circuit Interrupter) outlets in wet areas like kitchens and bathrooms. They prevent electric shock, making your home much safer.

Step 4: Upgrade Old Wiring (Out With the Old, In With the New)

If your home was built in the ’50s or ’60s, chances are your wiring could be outdated—like the shag carpet of the electrical world. Older systems like knob-and-tube wiring were once cutting-edge but are now considered fire hazards.

Replacing old wiring with modern, safer systems is a smart way to ensure your home stays safe. Don’t worry—we’re pros at replacing outdated wiring, so you can sleep easy at night knowing your home is safe and up to code.

Step 5: Get a Professional Inspection (We’ve Got You Covered)

Okay, you’ve checked your panel, inspected your outlets, and maybe even swapped out some old wiring. But how can you be 100% sure everything is safe? That’s where we come in!

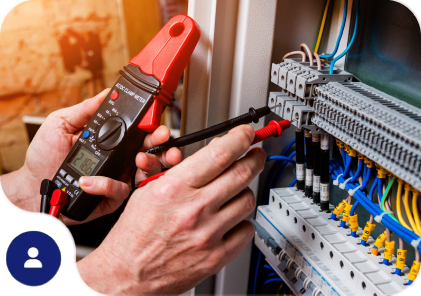
We recommend scheduling a professional safety inspection with Platinum Electric LLC. Our licensed electricians will give your electrical system a full review, spot any potential hazards, and suggest any necessary repairs or upgrades. It’s like a full-body checkup for your electrical system—better safe than sorry!

Wrapping It Up!

Safety first! Ensuring your electrical system is up to code doesn’t have to be intimidating. With these simple steps, you’ll be well on your way to having a safe and reliable electrical setup in your home. So, don’t wait for the lights to flicker or the breakers to trip—give your system a little TLC and rest easy knowing you’re on top of things.

Need help with your electrical checkup? Call in the experts at Platinum Electric LLC. We’re here to keep your home safe, so you can focus on enjoying the comfort of a worry-free, well-lit space!


The Power of Smart Lighting: A Step-by-Step Guide to Light Up Your Life!

Ever dreamed of controlling your home’s lighting with just a tap or a voice command? Imagine walking into your living room and saying, “Hey Google, dim the lights,” and poof, the perfect ambiance is set. Sounds like something out of the future, right? Well, the future is now, and smart lighting is here to make your life easier, brighter, and just a little bit cooler. Let’s walk you through how to set up a smart lighting system that will light up your life—literally!

Step 1: Pick Your Smart System (The Foundation of Your Bright Idea)

Before you start swapping out light bulbs, you’ll need to choose your smart lighting system. This is the heart of your setup. There are a few key players in the game—Amazon Alexa, Google Home, Apple HomeKit, and more.

Are you someone who loves speaking to your tech? Then a voice-controlled system with Alexa or Google Home could be the way to go. Want more hands-on control with a sleek app? Plenty of systems let you control your lights from your phone, with options to schedule, dim, or even change the color of your lights. The key is finding a system that fits your lifestyle. We’re here to help you choose the perfect match for you and your home!

Step 2: Choose Your Smart Lights (The Brightest Idea Yet)

Now comes the fun part—picking your bulbs! Smart lights aren’t just about turning on and off; they can do so much more. You can choose from color-changing bulbs to set the mood for movie night, or go with energy-efficient LEDs that save on your electric bill while keeping your house bright and welcoming.

Want your lights to go from warm and cozy to cool and bright depending on the time of day? You’ve got it. Need a bulb that matches your snazzy new smart system? We’ve got options galore! And don’t worry, we’ll make sure everything you pick integrates seamlessly with your new system. We’re not here for any confusing tech hiccups.

Step 3: Install the Hardware (Let There Be Light!)

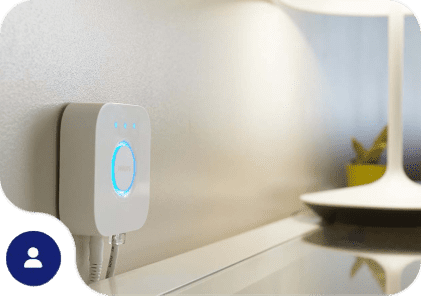
This is where we come in and handle all the technical stuff. Say goodbye to that old-fashioned light switch and hello to a sleek, smart dimmer. Our team will swap out your regular switches with smart dimmers and install any necessary hubs or controllers to get everything communicating smoothly.

But don’t worry—this isn’t a construction site. We’ll make sure the installation process is as seamless as possible. We’ll even take care of testing everything, so all you have to do is sit back, relax, and enjoy the glow-up of your home.

Step 4: Set Up Your App (Let’s Get Techy)

Once the hardware is all set up, it’s time to fire up the app and let the fun begin! Download the app associated with your system (don’t worry, we’ll guide you through it), and get ready to customize your lighting like never before.

Set lighting scenes (hello, movie night mood lighting), adjust the brightness with a simple tap, or even control your lights when you’re away from home. It’s like you’re the director of your own personal light show. Want to set a schedule to wake up to bright lights in the morning and dim them for movie nights? Done. You’re in control.

Step 5: Enjoy the Future (Light Control, Elevated)

Congratulations, you’ve officially entered the future of home lighting! Now that everything’s up and running, you can enjoy the convenience and energy savings of smart lighting. Dim the lights for a cozy evening, brighten them to get that morning boost, or just let everything run on autopilot—your house, your rules!

Smart lighting is about more than just convenience; it’s about creating the perfect atmosphere for every moment of your day. Whether you’re hosting a dinner party or winding down for the night, the power is in your hands—literally. So go ahead, light up your life and enjoy the convenience of controlling your home’s ambiance with just a tap, swipe, or voice command.

Wrapping It Up!

Smart lighting is the next step in making your home a little more futuristic, a lot more convenient, and—let’s face it—way cooler. With just a few easy steps, you’ll have a lighting system that’s smarter, energy-efficient, and totally in tune with your lifestyle. Ready to light up your life? Let’s get started and bring the future home today!


The Ultimate Guide to Installing Your Home’s Electric Car Charger: Plug In, Power Up!

Ready to take your electric vehicle (EV) charging game to the next level? Imagine waking up every morning to a fully charged car—no more scrambling for that last public charging spot or wondering if you’ll make it through your errands. Installing an electric car charger at home is easier than you might think! Here’s a step-by-step guide to get you plugged in and powered up—let’s roll!

Step 1: Check Your Power Supply (Let’s Talk About Volts)

Before you start imagining yourself sipping coffee while your car charges itself, let’s talk power. If you’re going with a Level 2 charger (the one most folks prefer for fast charging), you’ll need a 240-volt outlet. Wait—what does that mean? Well, most homes are equipped with 120-volt circuits, which are fine for your toaster or lamp, but not so great for charging an EV.

So, what do we do? We take a look at your electrical panel to check if there’s space to add a new 240-volt circuit. If there’s room, great! If not, don’t sweat it. We’ll sort it out by adding the necessary upgrades to make sure your system can handle the extra juice. No need to panic—we’ve got your back.

Step 2: Pick the Right Spot (Don’t Be a Charging Station Nomad)

Location, location, location! This is key when installing your EV charger. You want it to be as convenient as possible, so it should go somewhere your car parks regularly—preferably in your garage. But hey, if you don’t have a garage, no worries! You can still install your charger outside, as long as it’s weatherproof.

Think about where your car is most often parked, and make sure the charging cable can easily reach it. We’re not talking about setting up a charging station in the middle of the street here—choose a location that makes your life easier. Your future self will thank you when it’s pouring rain, and you’re still dry and charging your car in the garage. Bonus points if your charger is hidden neatly along the wall and doesn’t create a tripping hazard!

Step 3: Install the Charger (Let’s Get Plugged In!)

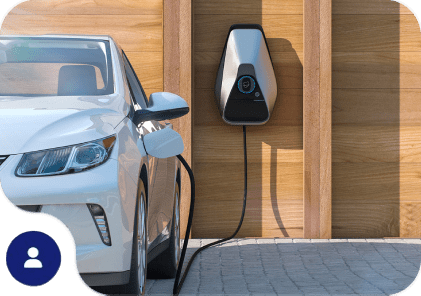
Once your electrical panel is ready and your location is locked down, it’s time to make the magic happen. Installing the charger involves a few critical steps. We’ll run the necessary wiring, attach the charger to the wall (securely, of course), and ensure it’s all up to code.

Safety is our top priority, so everything will be checked twice before we power it up. We’re not just here for the installation; we’re here to make sure everything is done right and safely. After all, you don’t want your charger getting fried the first time you plug it in, right?

Step 4: Get a Test Charge (Lights, Camera, Action!)

It’s time for the moment of truth—let’s plug in that car! Once your charger is securely installed, we’ll run a quick test to make sure everything is working like a charm. Watch the magic happen as the little green light flashes, and your car’s battery starts filling up.

This is the moment you’ve been waiting for—watching your car “drink” in the electricity! We’ll make sure the charger is charging efficiently and that everything is in tip-top shape.

Step 5: Enjoy the Ride (You’re Good to Go!)

Congratulations, you’re officially the proud owner of a home EV charging station! Now you can plug in your car overnight and wake up every morning with a full battery. That’s right—no more stressing about finding a charger in the wild or waiting in line at a crowded station. You’re free to cruise around with a charged battery and save time, money, and maybe even a little bit of your sanity.

So go ahead—enjoy the convenience of charging at home and get ready for a smooth ride into the future!

Wrapping It Up!

Installing an EV charger at home is easier than you think, and once it’s done, you’ll wonder why you didn’t do it sooner. Step by step, you’ll transform your home into a fully equipped EV charging station, making your life more convenient, efficient, and—dare we say—cool. Ready to plug in? We are! Let us help you power up your car and start charging at home today!

Platinum Electric LLC: Your Go-To Guide for Electrical Services in the Midwest

Welcome to the world of Platinum Electric LLC, where electrical issues are solved with precision, passion, and a touch of Midwest charm. Whether you’re building your dream home, upgrading your office space, or just need a quick fix, our team is here to ensure your electrical systems are as safe, functional, and reliable as they can be. Let’s take a dive into how we do things and how we can light up your life, one wire at a time.

Step 1: Who We Are and Why You Should Care

We get it—choosing an electrical contractor can feel a little daunting. It’s not like picking a new pair of shoes; there’s a lot more on the line! That’s where we come in. Platinum Electric LLC isn’t just another electrical contractor. We’re a team of experienced professionals who understand the true value of customer satisfaction. From start to finish, we treat your home or business like it’s our own, providing top-tier electrical services to both residential and commercial clients.

And guess what? We’re based right here in the Midwest, so we understand what it’s like to live and work in this region. Whether it’s the dead of winter or the peak of summer, our services are designed to keep your electrical systems running smoothly no matter the season. From small fixes to big projects, we’ve got your back.

Step 2: Residential Electrical Services – Powering Your Home with Precision

Your home is your sanctuary, and a well-functioning electrical system is key to keeping it cozy, safe, and efficient. Here’s how we can help:

  1. New Construction & Remodeling: Building your dream home or working on a major remodel? We’ll help you wire it right. From electrical panels and outlets to lighting designs and everything in between, we’re your go-to team for new construction projects. With our years of experience, we know exactly what it takes to create a functional and safe electrical system that fits your needs.
  2. Electrical Car Charging Installations: Have you made the switch to an electric vehicle (EV)? Congratulations! But now, how do you charge it? We’ll install an EV charger at your home, whether it’s in the garage or somewhere else, ensuring you can charge your car safely and efficiently. No more running to the public charging stations when you could be charging right at home!
  3. Lighting Control: Ever wished you could adjust your lights with just a tap on your phone or a voice command? With our smart lighting systems, you can. Imagine having complete control over the lighting in every room of your home, all from the palm of your hand. You can create the perfect ambiance for movie night, dim the lights for a cozy dinner, or set up automated schedules. We’ll make your home lighting as smart as your phone.
  4. General Maintenance & Repairs: From flickering lights to faulty outlets, electrical problems can disrupt the flow of your day. Don’t wait until things get worse. Call us for your electrical repairs, and we’ll get everything back to working order. From minor fixes to bigger, more complex issues, we’ll handle it all.

Step 3: Commercial Electrical Services – Powering Your Business Success

We understand that businesses run on energy—literally! At Platinum Electric LLC, we provide a range of commercial electrical services designed to keep your business operating smoothly and efficiently. Here’s what we can do for you:

  1. Office & Retail Space Wiring: Whether you’re building a new office or updating your existing space, we’ll make sure your electrical system is optimized for your needs. Proper wiring can make a world of difference in how efficiently your space operates. Let us take care of everything from power outlets and lighting to security systems and data cabling.
  2. Energy Efficiency Solutions: In today’s world, energy efficiency is more important than ever. We’ll help you reduce your energy consumption with energy-efficient lighting, smart thermostats, motion sensors, and more. Not only will you save money on your energy bills, but you’ll also do your part to help the environment.
  3. Emergency Lighting Systems: Safety is a top priority in any business. Emergency lighting systems are essential in case of power outages or emergencies. We’ll install and maintain these systems, ensuring that you and your employees are always safe and able to find your way in the dark.
  4. Electric Vehicle Charging Stations: Just like with residential services, we can install EV charging stations at your commercial property. This is especially beneficial for businesses that have electric vehicles in their fleet or want to offer charging options to their customers.

Step 4: Why Choose Platinum Electric LLC? – The Heart of Our Service

So, why should you trust Platinum Electric LLC with your electrical needs? Let’s break it down:

  1. Commitment to Excellence: We’ve built our reputation on the foundation of excellence. Every job, big or small, gets the attention it deserves. Our team is dedicated to getting it right the first time, and we stand by our work. No shortcuts, no cutting corners—just top-quality craftsmanship.
  2. Integrity: We believe in honesty, transparency, and integrity. When you work with us, you can trust that we’ll give you a fair estimate, explain all your options, and keep you updated every step of the way. You won’t find any hidden fees or surprises here!
  3. Customer Satisfaction: At Platinum Electric LLC, you’re not just another customer—you’re a valued member of the community. We take pride in our work and go the extra mile to ensure you’re completely satisfied. Your peace of mind is our top priority.
  4. Hands-On Approach: We’re not just electricians; we’re problem solvers. Whether it’s designing the perfect lighting scheme for your living room or rewiring your business, we’re here to offer hands-on support and guidance. We’ll take the time to understand your needs and provide solutions that make sense for you.

Step 5: How to Get Started – Let’s Power Your World!

Now that you know a little bit about who we are and what we do, let’s talk about how we can work together. Whether it’s a small residential project or a large-scale commercial job, Platinum Electric LLC is here to help. Here’s how you can get started:

  1. Contact Us: Call, email, or fill out the form on our website. We’ll schedule a time that works for you to discuss your project.
  2. Free Estimates: We offer free, no-obligation estimates. We’ll come out, assess the situation, and provide you with a clear and honest quote.
  3. Let’s Get to Work: Once you approve the estimate, we’ll get started on your project. Our team will work efficiently and professionally to complete the job on time and to your satisfaction.
  4. Enjoy the Results: When the job is done, we’ll make sure everything is working perfectly, and we’ll leave your space clean and tidy. Then, you can sit back, relax, and enjoy your newly powered world!

Final Thoughts – Let’s Get Plugged In!

At Platinum Electric LLC, we’re more than just your typical electrical contractor—we’re a team of passionate professionals who genuinely care about providing safe, functional, and long-lasting electrical solutions. Whether you need a simple repair or a complex installation, we’re here to power your world with precision, care, and a whole lot of Midwest flair.

Ready to light up your life? Give us a call today, and let’s make your electrical system shine!

The Ultimate Guide to Electrical Safety: Don’t Get Zapped!

When it comes to your home, one of the most important—and potentially dangerous—systems is the electrical system. It’s easy to forget about, tucked away behind walls, but electricity is powerful stuff! A few missteps, and you could end up with a nasty shock, or worse, an electrical fire. But don’t fret! With just a little attention to safety, you can keep your home buzzing without the danger. Here’s your ultimate guide to electrical safety that’s fun, easy to follow, and will help keep your home electrically sound!

Step 1: Inspect Outlets Regularly – The Power Points

Let’s start with the basics—those outlets. You may think that as long as you’re plugging in your phone charger, everything’s fine. But outlets are a lot more important than they seem. They need regular attention to ensure they’re in good working order. Here’s what to keep an eye out for:

  • Loose Outlets: If your plugs feel loose or fall out easily, that’s a sign the outlet is worn out. It might not hold a charge properly, or worse, it could cause a short circuit.
  • Cracked or Damaged Outlets: If the outlet cover is cracked or there are burn marks, it’s a clear red flag. A damaged outlet can cause sparks, leading to potential fire hazards.
  • Unusual Noises or Smells: If you hear a buzzing noise or smell something burning when plugging something in, shut off the power and call a professional immediately.

Pro Tip: If you notice any of these issues, it’s time to replace or repair the outlet. It’s a cheap fix compared to the potential costs of electrical damage!

Step 2: Upgrade Your Electrical Panel – The Brain of Your System

Now, let’s talk about your electrical panel—the brains behind your electrical system. It controls and distributes power to your whole house, and if it’s outdated, you’re in for some problems. If your panel’s over 30 years old, it’s time for an upgrade. Why? Well, here are a few reasons:

  • Outdated Technology: Older panels use fuses, which are less reliable than modern circuit breakers. Circuit breakers can be reset after they trip, while fuses need to be replaced.
  • Overcrowded Panels: If your electrical panel is crammed with too many circuits, it could cause overheating and a potential fire hazard.
  • Lack of Space: Newer homes have more gadgets and appliances, and they require more power. If your electrical panel doesn’t have room for new circuits, it’s time to get an upgrade to prevent overloading.

A quick check from a licensed electrician can determine if your panel needs an upgrade, and they’ll be able to recommend the best options for your home.

Step 3: Don’t Overload Circuits – Keep Your Gadgets in Check

We live in a tech-heavy world, and with that comes a whole lot of gadgets and devices that need power. But here’s the thing: Overloading circuits can be dangerous. It’s all too tempting to plug in five different devices into a single power strip, but that’s a recipe for disaster. Let’s break it down:

  • Know the Limits: Each circuit in your home has a specific power limit. Overloading a circuit can cause it to overheat, which increases the risk of fire. Always make sure you’re not running too many devices off a single outlet.
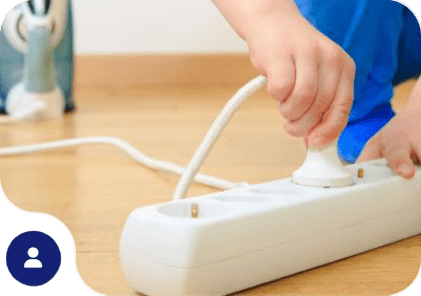
  • Use Power Strips Wisely: Power strips are great for adding outlets, but they aren’t an excuse to overload. Avoid daisy-chaining multiple power strips together. This can easily lead to an overload situation. Look for power strips that have built-in surge protectors for added safety.
  • High-Power Appliances: Devices like space heaters, air conditioners, or microwaves should have their own dedicated circuit. Don’t try to run them through a regular outlet or power strip—this can easily cause an overload.

Pro Tip: Pay attention to your circuit breakers. If they keep tripping, it could be a sign that your circuits are overloaded, and it’s time to reassess how you’re distributing power throughout your home.

Step 4: Install GFCIs in Wet Areas – Keep It Safe and Dry

GFCIs (Ground Fault Circuit Interrupters) are your best friend when it comes to wet areas like bathrooms, kitchens, basements, and even garages. GFCIs are designed to protect you from electric shock, especially in areas where water and electricity can mix. Here’s why they’re so important:

  • Water and Electricity Don’t Mix: If a faulty appliance or exposed wiring comes into contact with water, it can create a dangerous situation. GFCIs detect even slight imbalances in electrical current and shut off power instantly, preventing a shock.
  • Mandatory by Code: In many areas, GFCIs are required by law to be installed in bathrooms, kitchens, and other wet areas. If your home doesn’t have them, it might be time for an upgrade.
  • Easy to Spot: GFCI outlets have two buttons: a “reset” button and a “test” button. The reset button restores power after it’s been tripped, while the test button checks the GFCI’s functionality. Test them monthly to ensure they’re working properly.

Pro Tip: Don’t just rely on GFCIs as your only defense. Make sure your outlets are installed properly, and if you notice anything unusual (like sparks or water damage), call a pro!

Step 5: Call the Pros – When In Doubt, Get Help

Okay, we get it—DIY projects are fun! But electrical work isn’t something to take lightly. While it’s tempting to try and fix an outlet or replace a light fixture yourself, unless you have professional training, it’s best to call in an expert.

  • Licensed Electricians: A licensed electrician will not only have the proper training to handle electrical issues but will also know the local electrical codes and regulations. This ensures that your electrical system is up to code and safe for use.
  • Safety First: If you’re ever unsure about the safety of your electrical system, don’t hesitate to reach out to a professional. It’s much safer than risking an accident. Plus, they’ll have the tools, knowledge, and experience to troubleshoot and solve the issue properly.

Pro Tip: Electrical inspections should be done regularly, especially when buying a new home or renovating. It’s a small investment that will save you big-time headaches later on.

Step 6: Bonus Tips for Everyday Electrical Safety

While the big fixes are important, there are plenty of smaller, everyday steps you can take to ensure electrical safety:

  • Unplug Devices When Not in Use: Phones, laptops, and other devices still use power when plugged in, even if they’re fully charged. Unplugging them helps save energy and prevent overheating.
  • Avoid Running Cords Under Rugs: It’s convenient, but running electrical cords under rugs can cause them to overheat and potentially spark a fire. Always ensure cords are laid out safely and not in a high-traffic area.
  • Use Light Bulbs Correctly: Make sure to use light bulbs that match the wattage recommended for your light fixtures. Too high of a wattage can overheat the fixture and create a fire hazard.

Wrapping It Up: Stay Safe and Sound

Your home’s electrical system is crucial for your daily life, but safety should always be a priority. By following these simple steps, you can keep your electrical system running smoothly and safely. Remember: Regular inspections, smart upgrades, and knowing when to call in the pros can prevent dangerous situations and keep your home zapping with power in the best possible way! Stay safe, stay smart, and most importantly—don’t get zapped!


How to Upgrade Your Home’s Electrical System: A Step-by-Step Guide to Keeping Your Home Buzzing!

We’ve all been there: your phone is charging in the living room, your coffee maker is running in the kitchen, and the lights in the bathroom start flickering. Uh-oh! The dreaded electrical overload strikes again. If your home’s electrical system feels a bit like it’s stuck in the past, don’t fret! We’ve got you covered. Here’s your step-by-step guide to upgrading your home’s electrical system—no need to panic, we’ll keep it fun and easy.

Step 1: Know Your Needs (The Power Plan)

Before you start unscrewing outlets and flipping switches, take a step back. Think about your home’s current needs and future goals. Have you added new gadgets, appliances, or techy devices to your home recently? Maybe you’ve created a new home office that requires more outlets or a mini-fridge and coffee maker combo. If so, your electrical system might be due for an upgrade. A quick review of your current electrical load will help you figure out if you need extra outlets, more power, or even a panel upgrade.

Take some notes: do you have a lot of kitchen appliances running at once? A ton of gadgets in your living room? Knowing your current and future needs will help you plan for a smoother upgrade.

Step 2: Assess the Condition of Your Electrical Panel (The Heart of Your System)

Imagine your electrical panel as the brain of your home’s electrical system. It decides where and how electricity is distributed throughout the house. Now, if your electrical panel is still a fuse box from the 1950s or ‘60s, that’s a problem. It might be time for an upgrade to a modern circuit breaker panel.

Not only will a modern panel help you manage electrical loads better, but it also keeps you safer. Plus, if your panel is overcrowded with too many circuits, it could be a sign that you need more room for future upgrades. If you notice signs of aging, like rust, buzzing sounds, or breakers that keep tripping, it’s definitely time to bring in the pros. Trust us—this is one place you don’t want to skip on upgrading.

Step 3: Upgrade Outlets and Switches (The Stuff You Touch)

Okay, let’s talk about the “hands-on” part of your home: the outlets and switches. They’re the things you touch every day, so why not make them safer, more functional, and, hey, maybe even a little stylish?

First, if you’ve got any outlets that are cracked, loose, or showing signs of wear, replace them! Not only will new outlets improve safety, but consider adding GFCI outlets in high-risk areas like kitchens and bathrooms. These outlets automatically cut off the power if there’s a short, which is especially important around water.

Next, consider upgrading to smart outlets or dimmer switches. Smart outlets let you control things like lamps and electronics remotely, and dimmer switches set the perfect mood lighting for every room. It’s all about making life easier, more convenient, and just a little more stylish.

Step 4: Rewire When Necessary (Don’t Let Old Wires Hold You Back!)

If your home was built before the 1980s, you might be rocking some seriously vintage wiring. While we can appreciate the charm of older homes, when it comes to electrical wiring, outdated systems can be a serious fire hazard. So, if you’re experiencing frequent electrical issues like tripped circuits, sparks, or flickering lights, it’s probably time to consider rewiring parts of your house.

Rewiring can sound like a huge job, but it’s an investment that’ll make your home safer and more efficient. Plus, it’ll improve the overall performance of your electrical system. It’s like giving your house a little electrical facelift!

Step 5: Get Professional Help (Time to Call in the Pros)

Alright, so we’ve walked through the DIY-friendly upgrades—but when it comes to electrical work, there’s no shame in calling in the pros. While it’s tempting to pull out your toolbelt and tackle things yourself, electrical work is best left to the experts unless you’ve got proper training.

This is where Platinum Electric LLC comes in! We’re here to ensure your upgrades are safe, efficient, and up to code. We can assess your system, replace outdated panels, install new outlets, and even handle rewiring. Let us do the heavy lifting while you sit back and enjoy the peace of mind that comes with having a well-oiled electrical system.

There you have it! With these simple steps, you can keep your home’s electrical system buzzing like a pro. Whether you’re just adding a few outlets or completely rewiring your home, remember that upgrading your electrical system is an investment in both safety and convenience. So, take a deep breath, get your power plan together, and give us a call to help make your home safer, smarter, and more efficient!


newsletter

Stay informed with the latest electrical tips and updates! Sign up for our newsletter and never miss important news.