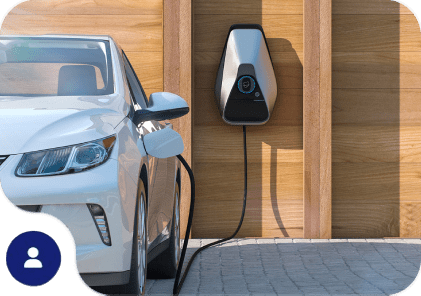
Ready to take your electric vehicle (EV) charging game to the next level? Imagine waking up every morning to a fully charged car—no more scrambling for that last public charging spot or wondering if you’ll make it through your errands. Installing an electric car charger at home is easier than you might think! Here’s a step-by-step guide to get you plugged in and powered up—let’s roll!
Step 1: Check Your Power Supply (Let’s Talk About Volts)
Before you start imagining yourself sipping coffee while your car charges itself, let’s talk power. If you’re going with a Level 2 charger (the one most folks prefer for fast charging), you’ll need a 240-volt outlet. Wait—what does that mean? Well, most homes are equipped with 120-volt circuits, which are fine for your toaster or lamp, but not so great for charging an EV.
So, what do we do? We take a look at your electrical panel to check if there’s space to add a new 240-volt circuit. If there’s room, great! If not, don’t sweat it. We’ll sort it out by adding the necessary upgrades to make sure your system can handle the extra juice. No need to panic—we’ve got your back.
Step 2: Pick the Right Spot (Don’t Be a Charging Station Nomad)
Location, location, location! This is key when installing your EV charger. You want it to be as convenient as possible, so it should go somewhere your car parks regularly—preferably in your garage. But hey, if you don’t have a garage, no worries! You can still install your charger outside, as long as it’s weatherproof.
Think about where your car is most often parked, and make sure the charging cable can easily reach it. We’re not talking about setting up a charging station in the middle of the street here—choose a location that makes your life easier. Your future self will thank you when it’s pouring rain, and you’re still dry and charging your car in the garage. Bonus points if your charger is hidden neatly along the wall and doesn’t create a tripping hazard!
Step 3: Install the Charger (Let’s Get Plugged In!)
Once your electrical panel is ready and your location is locked down, it’s time to make the magic happen. Installing the charger involves a few critical steps. We’ll run the necessary wiring, attach the charger to the wall (securely, of course), and ensure it’s all up to code.
Safety is our top priority, so everything will be checked twice before we power it up. We’re not just here for the installation; we’re here to make sure everything is done right and safely. After all, you don’t want your charger getting fried the first time you plug it in, right?
Step 4: Get a Test Charge (Lights, Camera, Action!)
It’s time for the moment of truth—let’s plug in that car! Once your charger is securely installed, we’ll run a quick test to make sure everything is working like a charm. Watch the magic happen as the little green light flashes, and your car’s battery starts filling up.
This is the moment you’ve been waiting for—watching your car “drink” in the electricity! We’ll make sure the charger is charging efficiently and that everything is in tip-top shape.
Step 5: Enjoy the Ride (You’re Good to Go!)
Congratulations, you’re officially the proud owner of a home EV charging station! Now you can plug in your car overnight and wake up every morning with a full battery. That’s right—no more stressing about finding a charger in the wild or waiting in line at a crowded station. You’re free to cruise around with a charged battery and save time, money, and maybe even a little bit of your sanity.
So go ahead—enjoy the convenience of charging at home and get ready for a smooth ride into the future!
Wrapping It Up!
Installing an EV charger at home is easier than you think, and once it’s done, you’ll wonder why you didn’t do it sooner. Step by step, you’ll transform your home into a fully equipped EV charging station, making your life more convenient, efficient, and—dare we say—cool. Ready to plug in? We are! Let us help you power up your car and start charging at home today!


